Smart phones have become such a ubiquitous part of our lives that we’re often unaware of what’s going on under the hood every time we snap a quick photo. You simply fire up the app, frame a shot and then take a picture.
The Raspberry Pi appeals to people who don’t mind getting their hands a little dirty and it doesn’t get more under the hood than using command line and finally a little bit of Python AP to record video in super slow motion!
Want to take infrared images in the dark? The code in this tutorial works just as well with the Pi Noir camera to take low light images. The Pi Noir is a great piece of kit for enabling nocturnal projects to be created such as a nature camera or CCTV system.
All these projects can be taken with either the regular Pi camera or the Pi Noir. If you’re using the Pi Noir you’ll have to flood the area you’re shooting with infrared light. For every-day video and photo taking you’re going to want to stick to the regular Pi camera.
Getting Started
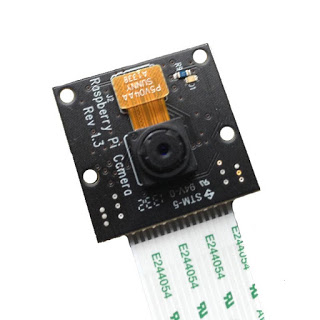
Installing the camera is relatively quick and painless but you’ll need to power down your Raspberry Pi by unhooking the power cable from the Pi. Next you’ll need to find the CAMERA port which is located between the HDMI and Ethernet Ports.
When you’ve found the camera port you’ll need to carefully lift the top and bottom edges of the connector vertically, they will gently slide up and stop when in place. The connector is fragile so only use minimal pressure to lift the cover of the port.
Take the camera out of the box and slide the ribbon connector into the CAMERA connector ensuring the blue edge faces the Ethernet port. The camera is rather fragile and sensitive to static so be gentle! With the ribbon inside the connector, lock the ribbon in place by gently pushing the connector edges back down. Now that the camera hardware is installed you can now power the Raspberry Pi back on.
Boot up your Raspberry Pi to the desktop and type the following command into terminal:
sudo raspi-config
This will pull up a configuration suite to automate setting up your Pi. Choose option 5 to enable the camera. At the menu prompt navigate to Enable Camera and press enter. Select Enable on the next screen, and then navigate to Finish, and you should be prompted to reboot your Raspberry Pi. Once your Pi reboots your camera should then be enabled.
Now that the camera is enabled the next step is to check that it is configured properly. Do this using the command raspistill in LXTerminal
raspistill -o image.jpg
The camera will be activated once you see a red light on the unit followed by a preview on the screen after a few seconds. Make sure look pretty, and then take a picture. You can open the picture to see how you look via the file manager. It will either be in /home/pi or in whatever directory you were in when you used the command. If you still can’t find your photo it’s possible that your camera is not connected correctly and the raspi-config shows the camera as enabled. Make sure you do not remove the camera from the connector while the Raspberry Pi is on as it will cause damage to the camera.
Assuming you have successfully tested the camera and it’s working, it’s now time to install the latest Python API for the camera. While you are in all likelihood using the latest version of Raspbian we strongly recommend that you update your software. You’ll need your Pi to be connected to the Internet. The easiest way to do is by connecting your Ethernet cable directly to your router. Once you’ve done this open up terminal and type in the following command:
sudo apt-get install python-picamera python3-picamera python-rpi.gpio
Now that we’re up to date it’s time to take a picture.
Project 1: Take a Picture With Python 3
If you’re capturing images in low light or at night, use an infra red LED connected to the Raspberry Pi 3v3 and GND pins via a 220 ohm resistor. All Raspberry Pi models have two 3v3pins, located at Pin 1 and Pin 17.
Open Python 3 by going to the main menu, this should be on the top left of the screen in the latest version of Raspbian. Left click and go to Programming and select Python 3. The application IDLE will open and you should see the IDLE Python shell, writing code here produces instant results, we don’t want this so go to File >> New Window to open a blank document to place our code in.
The code we’re going to use here is quite simple.
The first thing we’re going to do is import two libraries, the time used to control duration of a preview and picamera which is the Python API for the camera.
import time
import picamera
Now it’s time to move to the main body of code where we start the preview window, wait a couple of seconds and then capture the image as ‘foo.jpg’ in the same directory where we ran the code.
with picamera.PiCamera() as camera:
camera.start_preview()
time.sleep(2)
camera.capture('foo.jpg')
Project 2: Creating a Timelapse (Both Cameras)
If you’re capturing images in low light or at night, use an infra red LED connected to the Raspberry Pi 3v3 and GND pins via a 220 ohm resistor. All Raspberry Pi models have two 3v3pins, located at Pin 1 and Pin 17.
You captured a single file and overwrote it each time the code was run in the first project. What if you wanted to create a sequence of images? A time lapse video is where you take one image every minute, hour, day and then you combine them to make a video that accelerates through a time period. For example you could capture a scenic sunrise or sunset. In this code example we are going to create a time lapse that captures an image every 5 minutes as a separate file.
import time
import picamera
   try:
   with picamera.PiCamera() as camera:
   i = 0
      while True:
      camera.start_preview()
      time.sleep(2)
      camera.capture(str(i)+(“.jpg”))
      i += 1
    time.sleep(30)
    except KeyboardInterrupt:
    print(“Exiting”)
The code is very similar to what we used in the first project except it uses a loop to capture an image every 30 seconds and then automatically creates a filename by setting the variable I to 0 and then increments it by 1 every time the loop is run. The try…except construction is used to instruct the code to attempt the code in the try section first. Should there be an error or if the user presses CTL+C to close the application then “Exiting” will print on the screen.
Project 3: Slow Motion (Both Camera)
Now comes the fun part! We’re going to push the camera to its limit and use it to record 90 seconds frames per sec!
At the time this was published the Python picamera is not able to record at this speed so we’ll use the raspivid command at terminal instead.
Type the following command in terminal and press Enter:
raspivid -w 640 -h 480 -fps 90 -t 100000 -o slowmo.h264
Now you should see your video appear in super slow motion!
https://www.youtube.com/watch?v=r4eTLhWBBQk
This is nice for fast moving projects such as recording a race or a fast moving swing.
The following Python script is used to automate the process. The os library is used to enable Python to be run on terminal commands. The input is nested inside a str() function which converts the captured data into a string. On the next line the suffix “.h264” is attached to the filename provided and this updates the variable name. We call the raspivid terminal command to record the video by using the os.system function. At the end of the line the name variable is used for the filename. The bottom line of code handles the playback of the video.
import os
while True:
    name = str(input("Hi, please type in the name of the file to record: "))
    name = name+".h264"
    os.system("raspivid -w 800 -h 600 -fps 90 -t 10000 -o "+name)
    os.system("omxplayer "+name)

0 comments